AI & Integrations
Use AI Architect, install apps, and integrate with other services.
Use AI Architect to Configure an Application
Describe, review, and build applications with AI Architect.
Install Ready-Made Apps from the App Store
Install a ready-made application and customize the result.
Connect Zapier and Other Integrations
Connect Studio to Zapier and configure the Inbound API.
Use AI Architect to Configure an Application
AI Architect helps configure a Studio application from a business description. It does not generate a separate codebase. You describe the business application, review the proposed Studio objects, and approve the build.
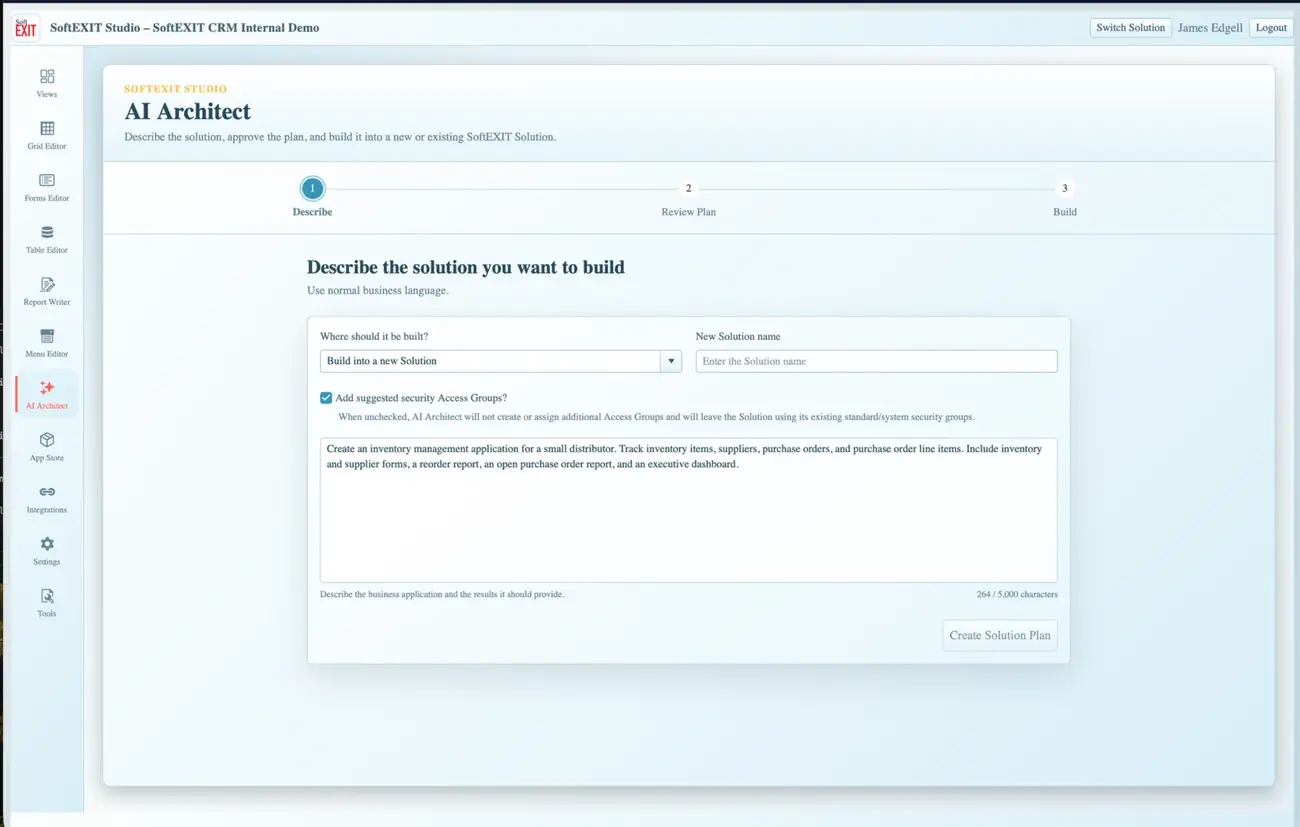
The three phases: Describe, Review Plan, Build
- Open AI Architect from the left navigation.
- Choose whether to build into a new or an existing Solution, and enter the new Solution name when appropriate.
- Consider the Add suggested security Access Groups? option.
- Describe the business entities, relationships, Forms, Grids, Reports, Dashboards, and navigation you want.
- Select Create Solution Plan and wait for the plan to be prepared.
- Review the proposed Tables, Forms, Grids, Reports, Charts, Gauges, Dashboards, Navigation, and Access Groups.
- Approve the plan and proceed to the build step only when the structure reflects what you want.
- Open the resulting Solution and test its data-entry screens and permissions.
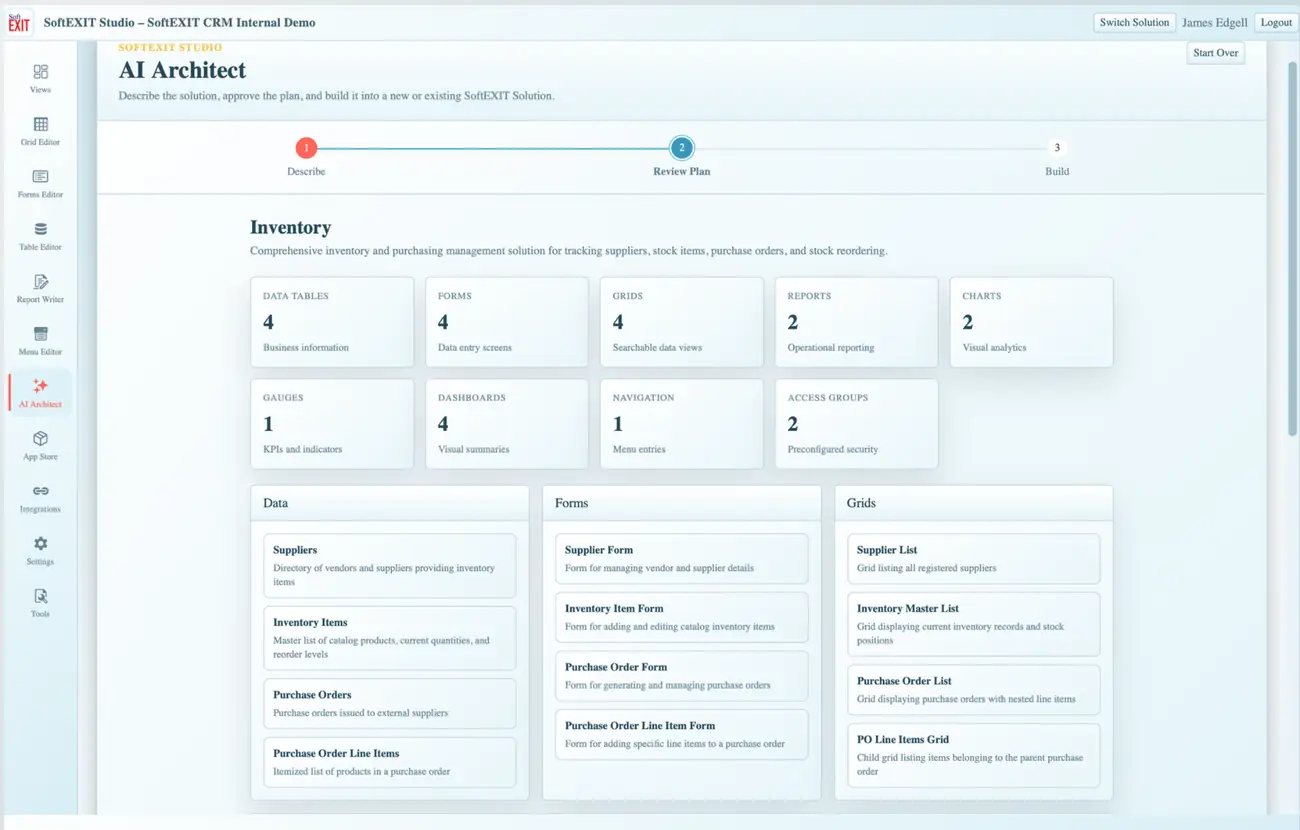
Example description
“Create a small inventory application with Suppliers, Inventory Items, Purchase Orders, and Purchase Order Line Items. Include supplier and inventory item Forms, a reorder report, an open purchase order report, and a dashboard showing stock and purchasing activity.”
AI Architect should be treated as a faster configuration starting point: review its choices and refine them using the regular Studio editors. The screens show that generating a plan may take several minutes, depending on complexity.
Install Ready-Made Apps from the App Store
The App Store provides preconfigured applications that can help you get started faster. Available entries may include a CRM, blank Solution, and other business applications. Installing an app uses Studio’s existing components and does not change the basic approach to Tables, Forms, Views, and Menus.
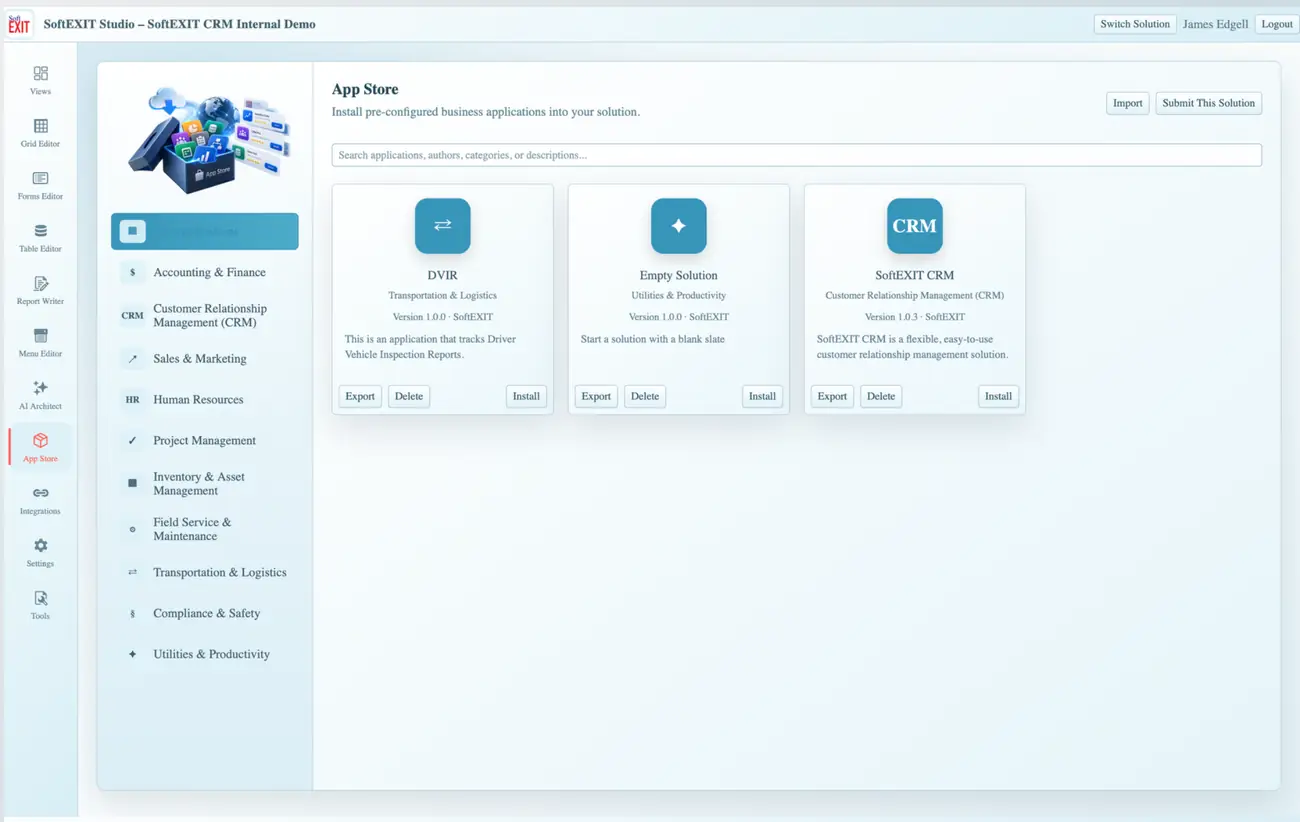
Install an application
- Open App Store in Studio.
- Browse or search for an app that addresses your business need.
- Read its description and review the components it is expected to provide.
- Select Install if the option is available for your role.
- Choose Build into a new Solution or the relevant existing-Solution option.
- If building into a new Solution, supply its name.
- Decide whether to add the application’s suggested security Access Groups.
- Confirm the installation and then use Switch Solution to open the result.
- Review its Tables, Forms, Views, and menu before inviting other users.
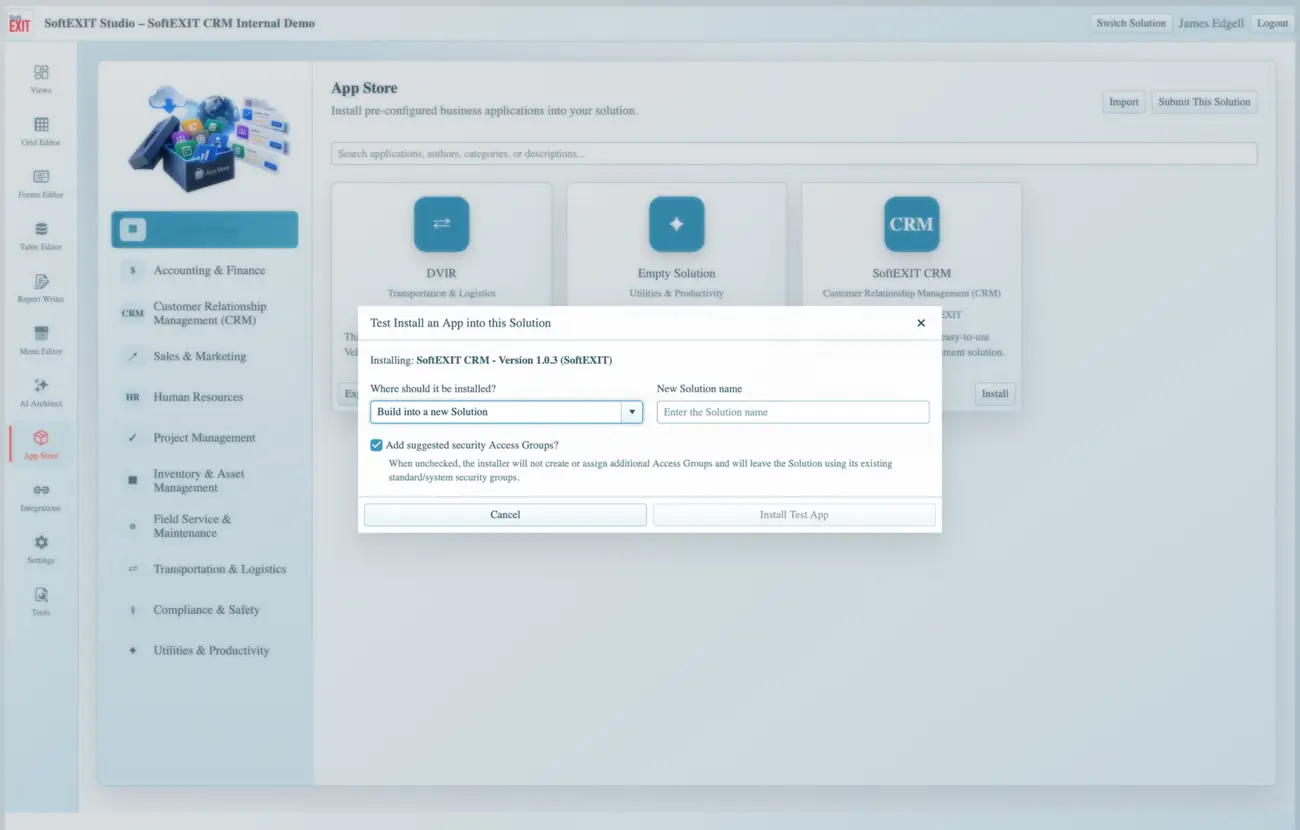
Customize after installation
An installed app is a starting point rather than a rigid silo. With suitable permissions, you can edit its Forms, add fields and related Tables, change dashboards, and organize navigation to suit your business. Export/import and administration options may be limited to users with the appropriate role.
Connect Zapier and Other Integrations
The Integrations section connects Studio data to outside applications. It includes an Inbound API for receiving authenticated external information and, for eligible Professional-plan organizations, a Zapier integration. The Inbound API is also available on the Starter plan; premium connector configuration has separate plan and permission requirements.
Zapier: choose which Tables may be used
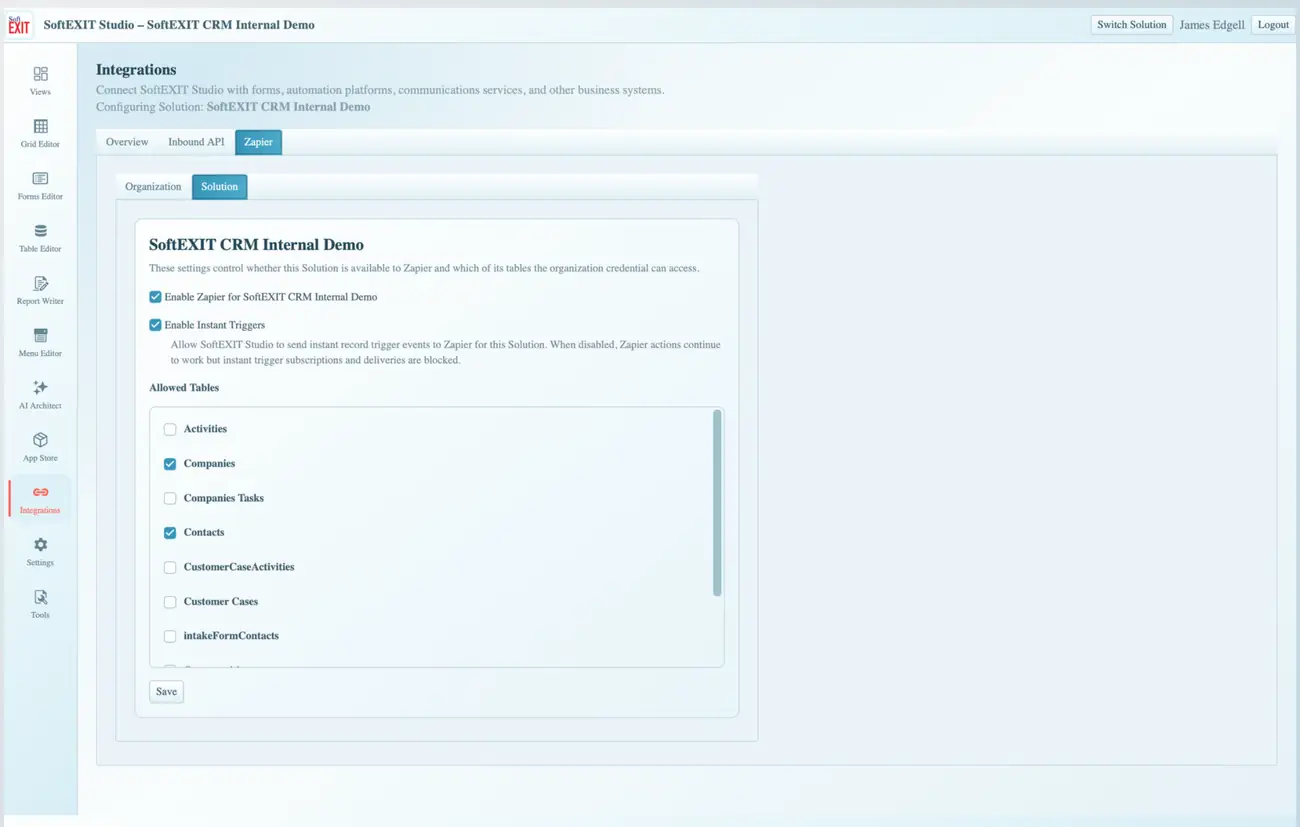
Open Integrations → Zapier. The Solution tab includes controls to enable Zapier for the active Solution, enable instant triggers, and select Allowed Tables. Enable only the Tables that an integration needs and save the settings. Organization-level configuration and credentials are managed separately, subject to your permissions.
What Zapier can automate
Zapier workflows can react when Studio records are created, updated, or deleted and can perform supported record actions such as creating, updating, retrieving, finding, and deleting records. For example, a new website inquiry could create a Studio contact; or an updated opportunity could start a notification process in another service.
For detailed setup, authentication, trigger actions, field mapping, and troubleshooting, see the SoftEXIT Studio Zapier Help guide. Confirm that the final published help URL matches your website.
Inbound API: accept information from other systems
Open Integrations → Inbound API and choose New Inbound API. In General, provide a name, optional Tag, destination Table, and default Record Owner. Configure input-to-field mappings on the Mapping tab; use Credentials for connection details; review Activity for request information.
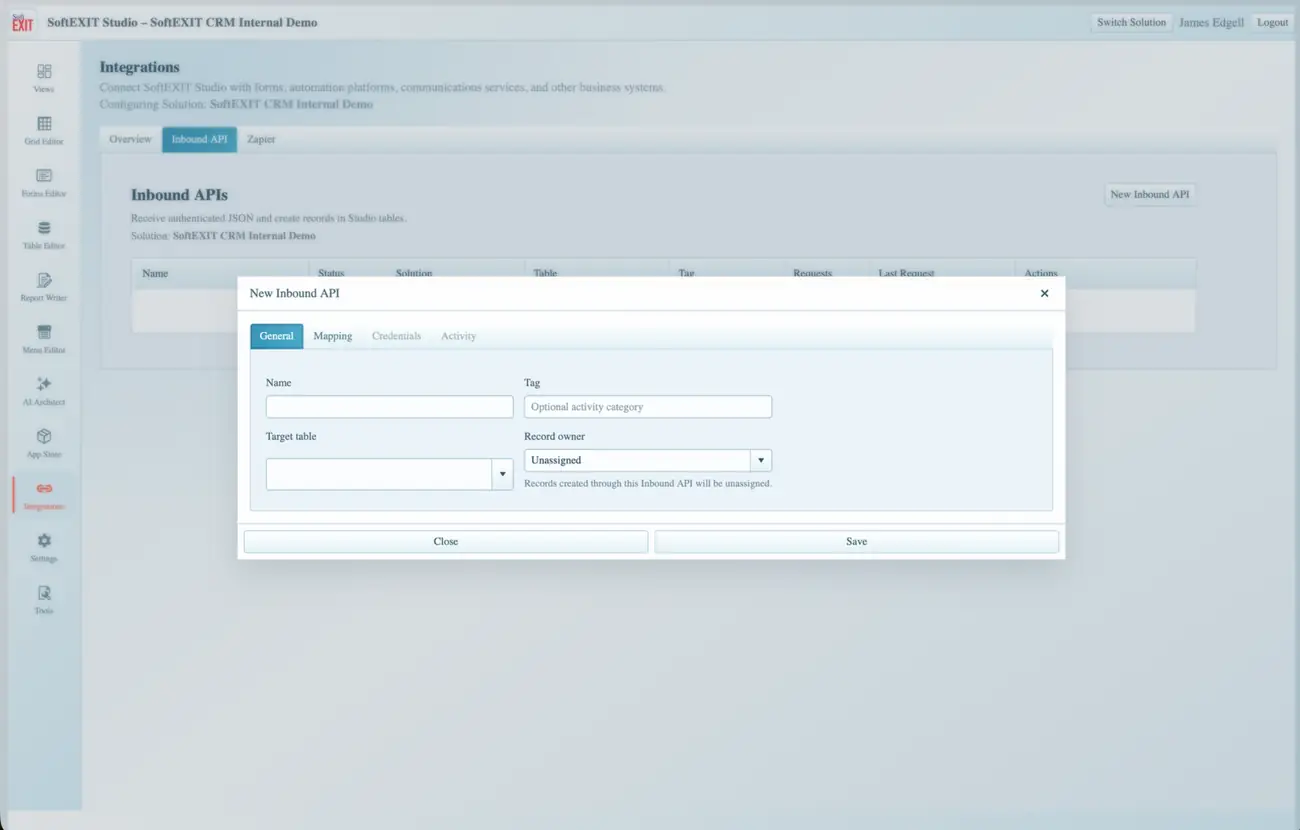
For a website inquiry, map incoming name, email, phone, and message values to your Studio Table. The external system sends an authenticated JSON request to the configured endpoint, and Studio creates the corresponding record. Keep tokens secret and validate the mapped fields with a controlled test submission before going live.
More SoftEXIT Studio Help
Use the Getting Started index to explore other subjects.