Welcome: How SoftEXIT Studio Works
Understand Solutions, Tables, Forms, Views, and the recommended learning path.
Explore the Studio Interface
Find your way around the Studio navigation, Views, and Solution controls.
Create a Solution and Plan Its Data
Plan your first Solution and the relationships between its Tables.
Welcome: How SoftEXIT Studio Works
SoftEXIT Studio is a no-code platform for building and operating business applications. A Solution is your application workspace. Inside it, Tables define business data, Forms make data entry easy, View Components display the data, and Menus organize the experience for users. You can design the components manually, use AI Architect to configure a solution from a description, or install an application from the App Store.
This guide follows an approachable example: a client and activities tracking application. Tool availability depends on your role and your organization’s permissions.
Recommended learning path
- Open an existing Solution to understand how users work with records.
- Create or install a Solution to explore its structure.
- Define Tables and relationships, then design Forms.
- Create Grids, Reports, Charts, and Dashboards.
- Organize Views using the Menu Editor.
- Grant the right Access Groups, then explore integrations and AI-assisted configuration.
Explore the Studio Interface
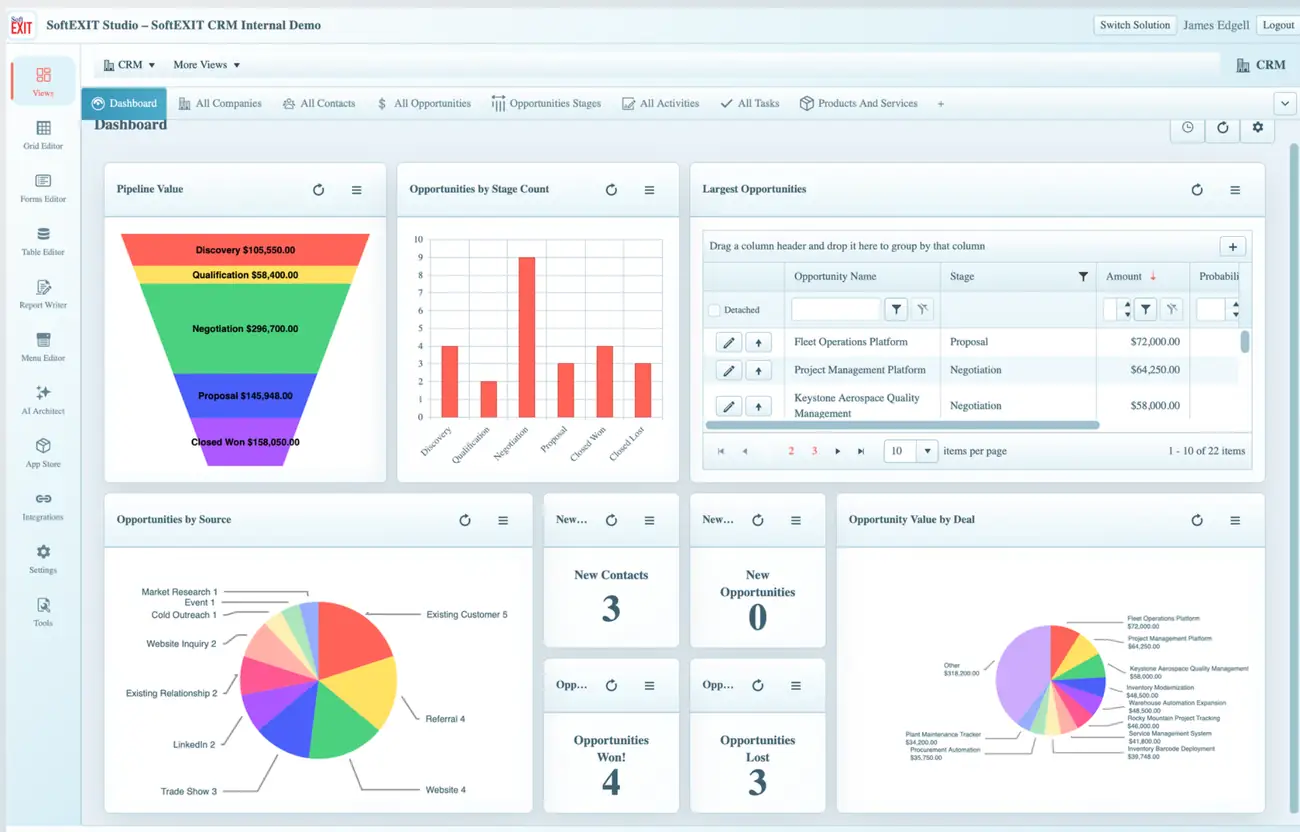
The navigation on the left contains the main design areas: Views, Grid Editor, Forms Editor, Table Editor, Report Writer, Menu Editor, AI Architect, App Store, Integrations, Settings, and Tools. The upper-right Switch Solution control changes the Solution you are working in.
Choose Views to use the application as an end user would. The top navigation contains the configured View Groups and tabs. A View can include a dashboard, Grid, Chart, Status Board, or a combination of components.
Before creating anything
Confirm the active Solution in the top header. Open an existing Grid, inspect its fields, and try filtering or sorting. Users with appropriate access can add a record through a Form and see that change reflected in the associated View. A business user may see fewer design options than an administrator.
Create a Solution and Plan Its Data
A Solution brings together your data model, Views, application menu, and configuration. A new blank Solution starts with a Main Menu. Give each Solution a purpose-driven name such as Client Activity Tracker or Inventory Operations.
Plan your Tables before you build
For a small tracker, start with Clients (one record per client) and Calls (many calls for a client). A separate Activities Table could also hold meetings, tasks, or follow-ups. Keep each Table focused on one business concept rather than repeating client details in each activity record.
Studio handles parent-child data hierarchies. For example, Companies can contain Contacts and Opportunities, while an Opportunity can have related Activities.
More SoftEXIT Studio Help
Use the Getting Started index to explore other subjects.