Build Tables and Configure Fields
Configure Tables, fields, Pick Lists, and parent-child relationships.
Design Forms for Data Entry
Build data-entry Forms with layouts, defaults, validation, and visibility rules.
Build Tables and Configure Fields
Open Table Editor from the left navigation. Select an existing Table in the tree or choose New Table. Enter a useful Display Name and choose the appropriate Parent Table, if the records belong under another Table. The Table Editor shows field names, user-facing labels, types, and the commands used to edit fields.
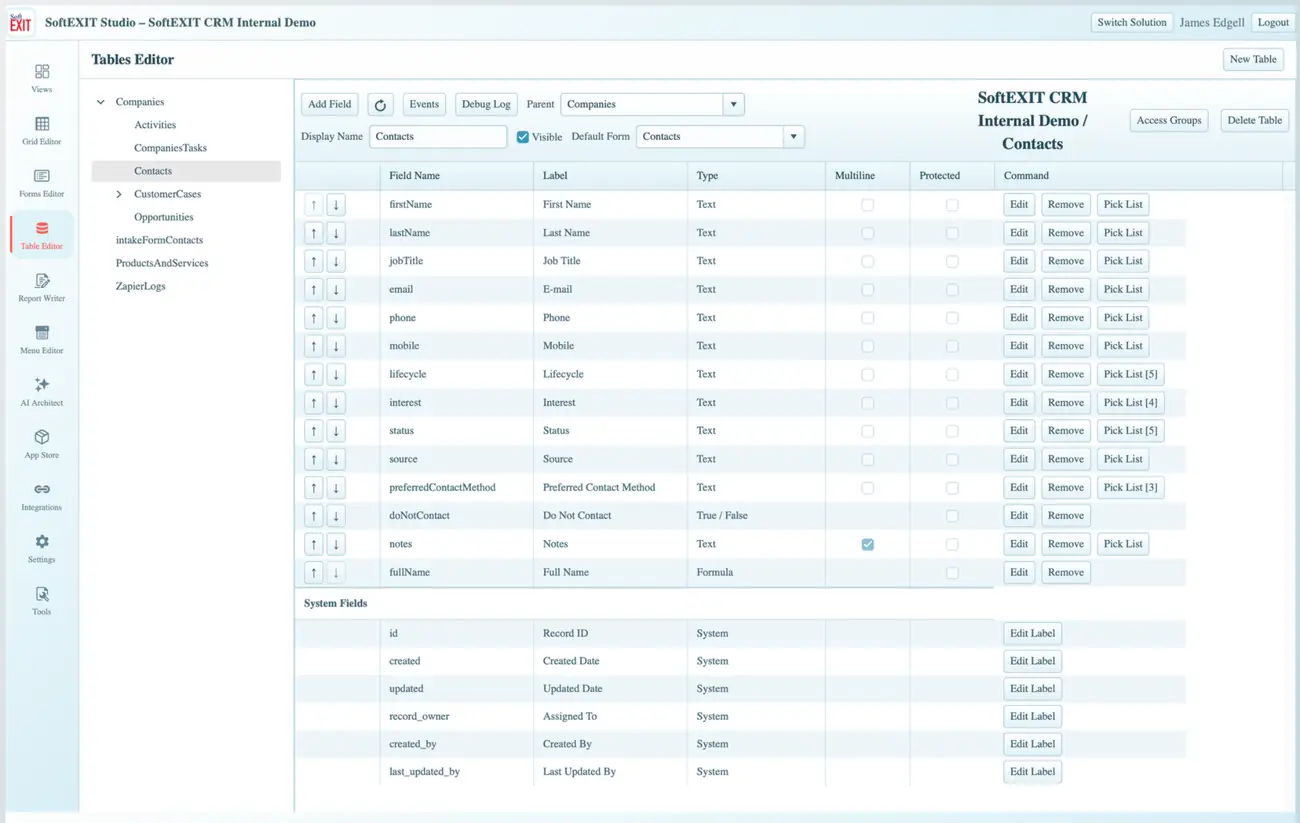
Create the fields
- Create or select the Table you want to edit.
- Choose Add Field.
- Set a stable Field Name and a readable Label.
- Choose the field type (such as Text, Date, DateTime, Integer, Decimal, Boolean, Currency, Percentage, Lookup, or another available type).
- Configure type-specific options and save the field.
- Repeat for the information needed by the Form and reports.
For a Clients Table, try Client Name, Email, Phone, and Status. For Calls, try Subject, Call Date, Duration Minutes, Outcome, and Follow Up Date.
Use Pick Lists for consistent values
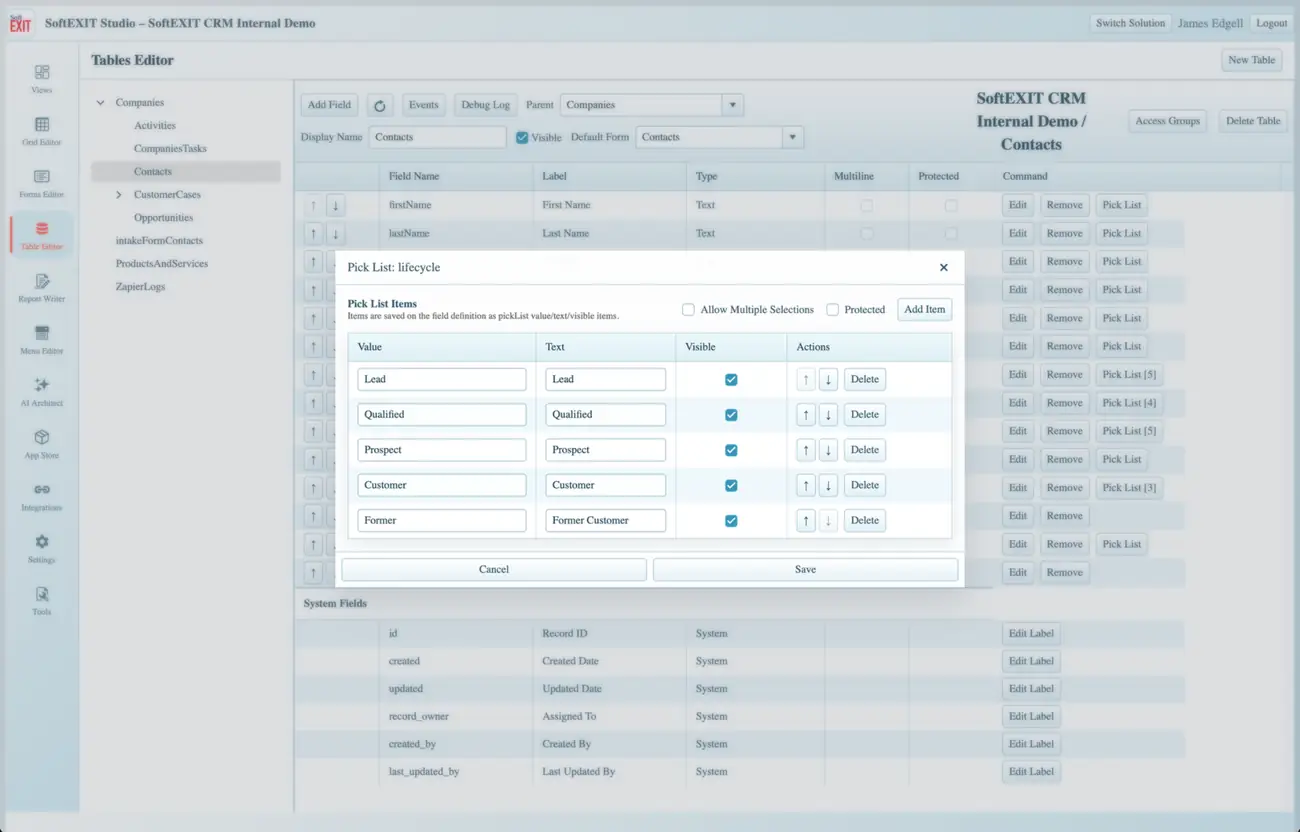
Select the Pick List command beside a supported field. Add one item per business value, including the stored Value and the displayed Text. Set which items are Visible, arrange their order, and enable Allow Multiple Selections only where appropriate. For example, a Client Lifecycle list might contain Lead, Qualified, Prospect, Customer, and Former Customer.
Set up relationships and permissions
Choose a parent in the Table Editor when records belong to another Table. In the screenshot, Contacts is under Companies. A parent-child relationship enables contextual child Grids without retyping the same parent data. Use the Table’s Access Groups configuration to control applicable data permissions. The system fields (Record ID, Created Date, Updated Date, Assigned To, and related audit information) are maintained separately from your business fields.
Tip: Test your relationship using two different parent records and verify that their child records remain distinct.
Design Forms for Data Entry
Open Forms Editor, choose the Table, and select or create a Form. The left panel lists available business and system fields. The center area is the drag-and-drop layout, and the right Field Inspector provides the settings for the selected field.
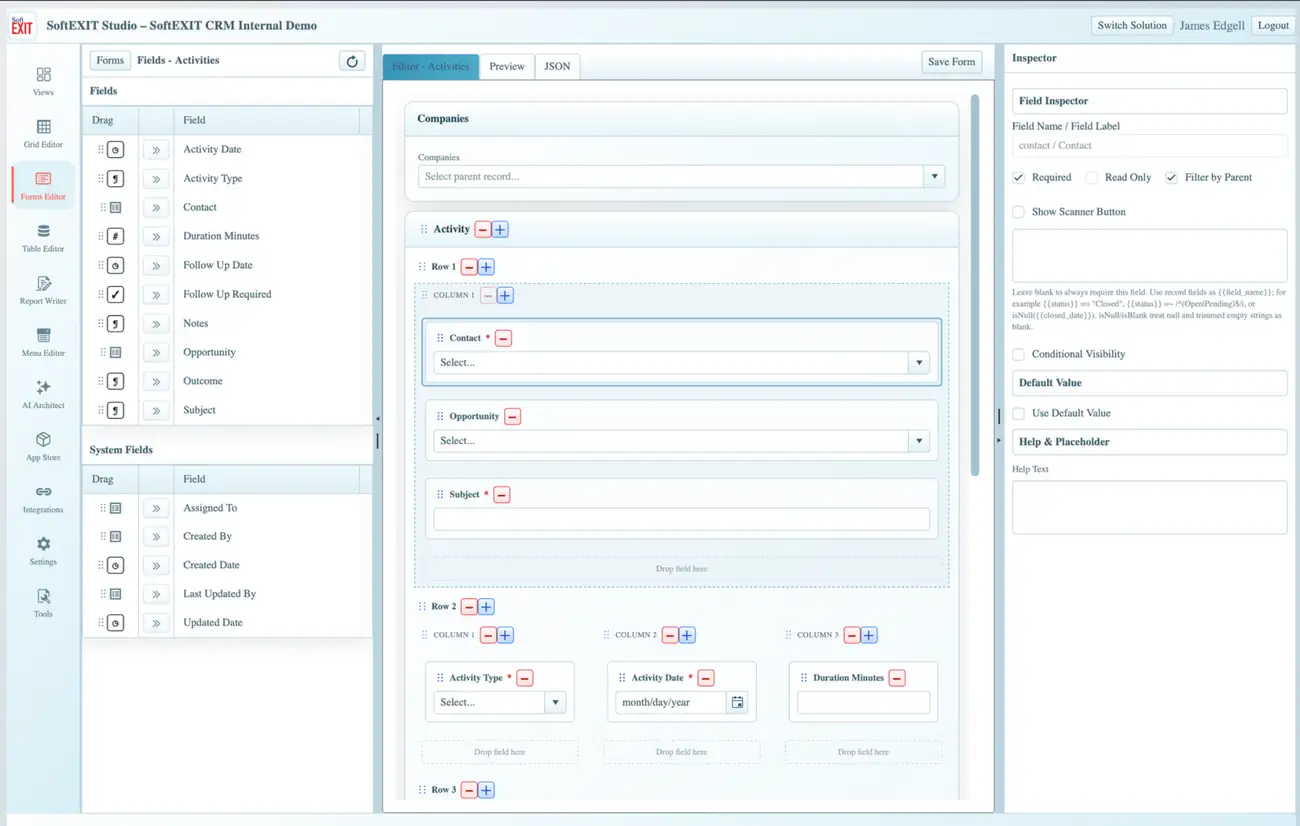
Build a usable Form step by step
- Add a Section to describe related fields, such as Client Details or Call Information.
- Add Rows and Columns to establish the layout.
- Drag fields from the left panel into the desired column.
- Select a field and use the Inspector to configure Required, Read Only, help text, placeholder text, and the other available settings.
- Use parent filtering on applicable Lookup fields when you want to limit choices to the currently selected parent.
- Use Preview to test the display and validation.
- Save the draft as needed and select Save Form when ready.
- Return to the Table Editor and set the Table’s Default Form where applicable.
Make business rules practical
Studio supports field-level required settings, default values, and conditional visibility. For instance, you might show a Follow Up Date only when Follow Up Required is selected. Prefer small, understandable form rules that guide data entry; you do not need a heavyweight workflow for every conditional requirement.
Use descriptive labels and help text so new employees can complete the Form without memorizing internal field names. Test both new-record and existing-record editing.
More SoftEXIT Studio Help
Use the Getting Started index to explore other subjects.